

Guide de démarrage rapide de Mapbender
Mapbender est un cadre logiciel de géoportail basé web pour publier, enregistrer, découvrir, naviguer, surveiller et accorder un accès sécurisé aux services d’infrastructure de données spatiales.
Ce guide de démarrage rapide décrit comment:
démarrer Mapbender
créer une application
charger un Web Map Service (OGC WMS)
configurer un WMS
ajouter des éléments à une application
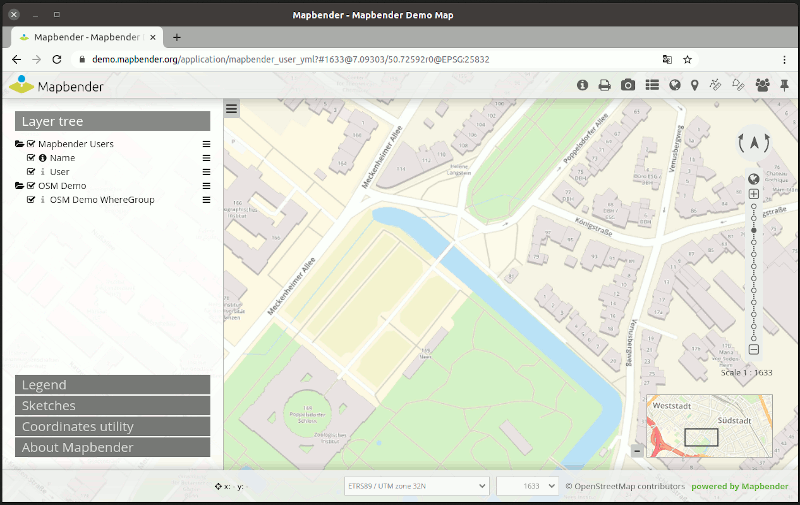
Voici à quoi peut ressembler une application Mapbender:
Contenu
Démarrer Mapbender
Choose from the start menu or visit http://localhost/mapbender/app.php. The application will take a few moments to start up
Si vous avez des difficultés en cours de l’exécution de Mapbender, s’il vous plaît vérifiez si votre serveur web Apache et votre base de données PostgreSQL sont en cours d’exécution. Ou si vous utilisez SQLite comme base de données si vous avez un accès en écriture au fichier.
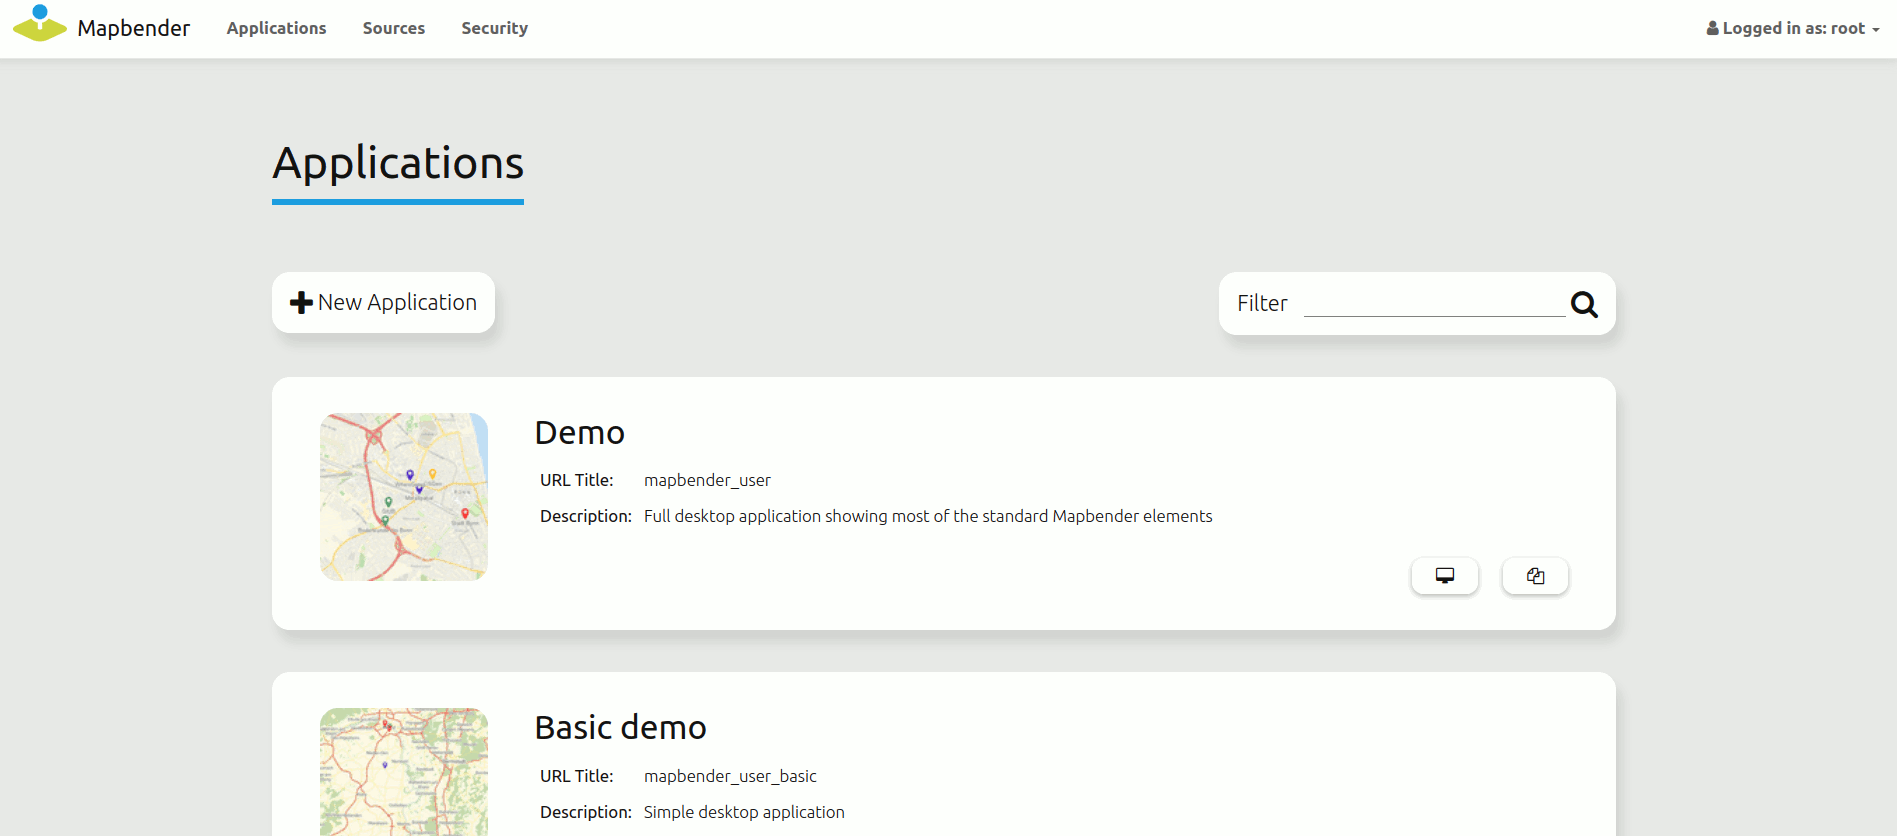
La page d’accueil répertorie les applications qui sont publiques et peuvent être utilisées par tous les utilisateurs. Les applications sont listées avec une capture d’écran, un titre et une description.
Vous pouvez ouvrir une application en cliquant sur le titre, la capture d’écran ou le bouton de démarrage.
Avant que de pouvoir administrer avec Mapbender il faut se connecter pour accéder à la page d’administration.
Cliquez sur Connexion en haut à droite pour ouvrir la page de connexion. Connectez-vous avec le nom d’utilisateur root et le mot de passe root (Il s’agit de l’utilisateur et du mot de passe par défaut que vous obtenez après l’installation de Mapbender sur OSGeoLive. Veuillez modifier le mot de passe root si vous souhaitez exécuter un environnement productif. Veuillez ne pas supprimer l’utilisateur root.).
Créer une application individuelle
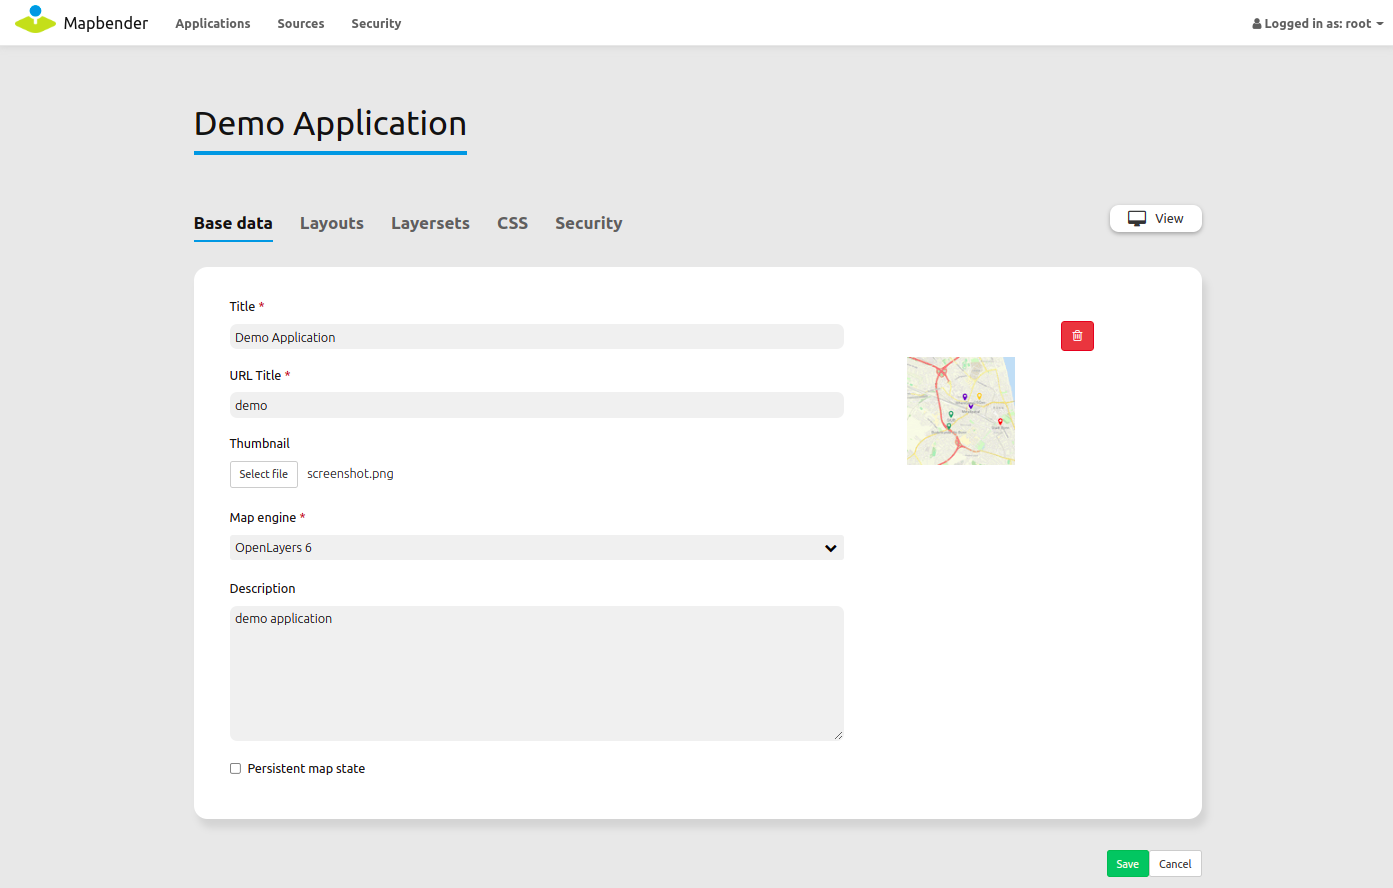
Créez une nouvelle application en fournissant des informations de base sur celle-ci. Après cela, utilisez le mode d’édition pour ajouter des éléments, des couches et de la sécurité.
Choisir
Définir un titre et une description pour votre application
Define an URL title which will be used in the URL to open the application. It can be the same as the title
Upload an image file as screenshot for the application overview
Choose a template for your application
Choose the button Create to create the application
Astuce
You can easily create an application by copying an existing application using the Duplicate Application button.
Your application is set up. Next you need a WMS to be displayed in your application.
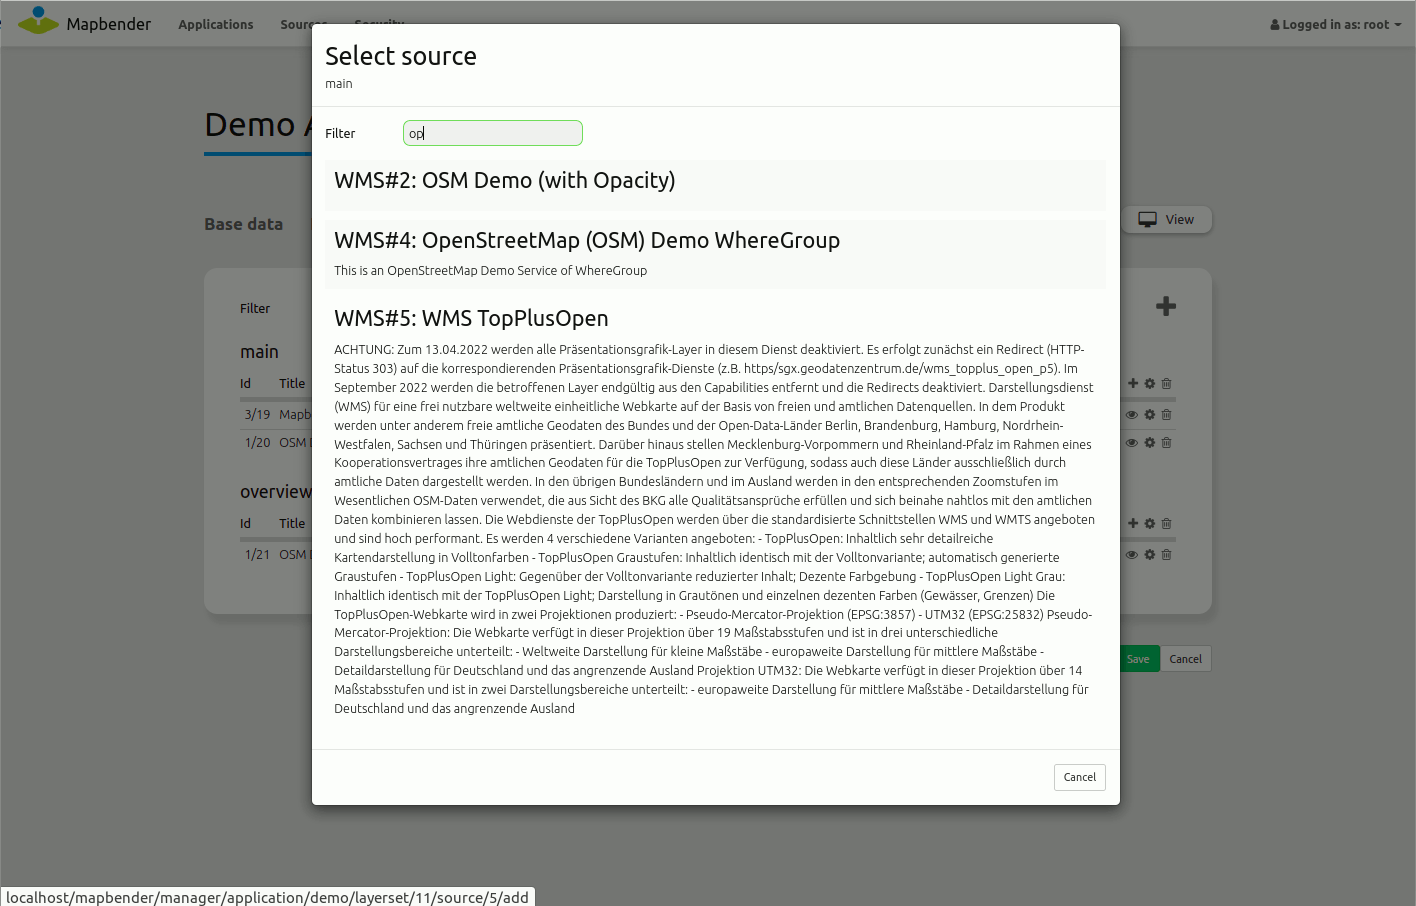
Chargement de services Web Map
Vous pouvez charger des Web Map Services (WMS) OGC dans votre application.
Un WMS renvoie un fichier XML lorsque le document getCapabilities est demandé. Cette information est analysée par Mapbender et Mapbender obtient toutes les informations nécessaires à propos de ce service à partir de ce fichier XML
Astuce
Vous devez d’abord vérifier le document Capabilities dans votre navigateur avant d’essayer de le charger avec Mapbender
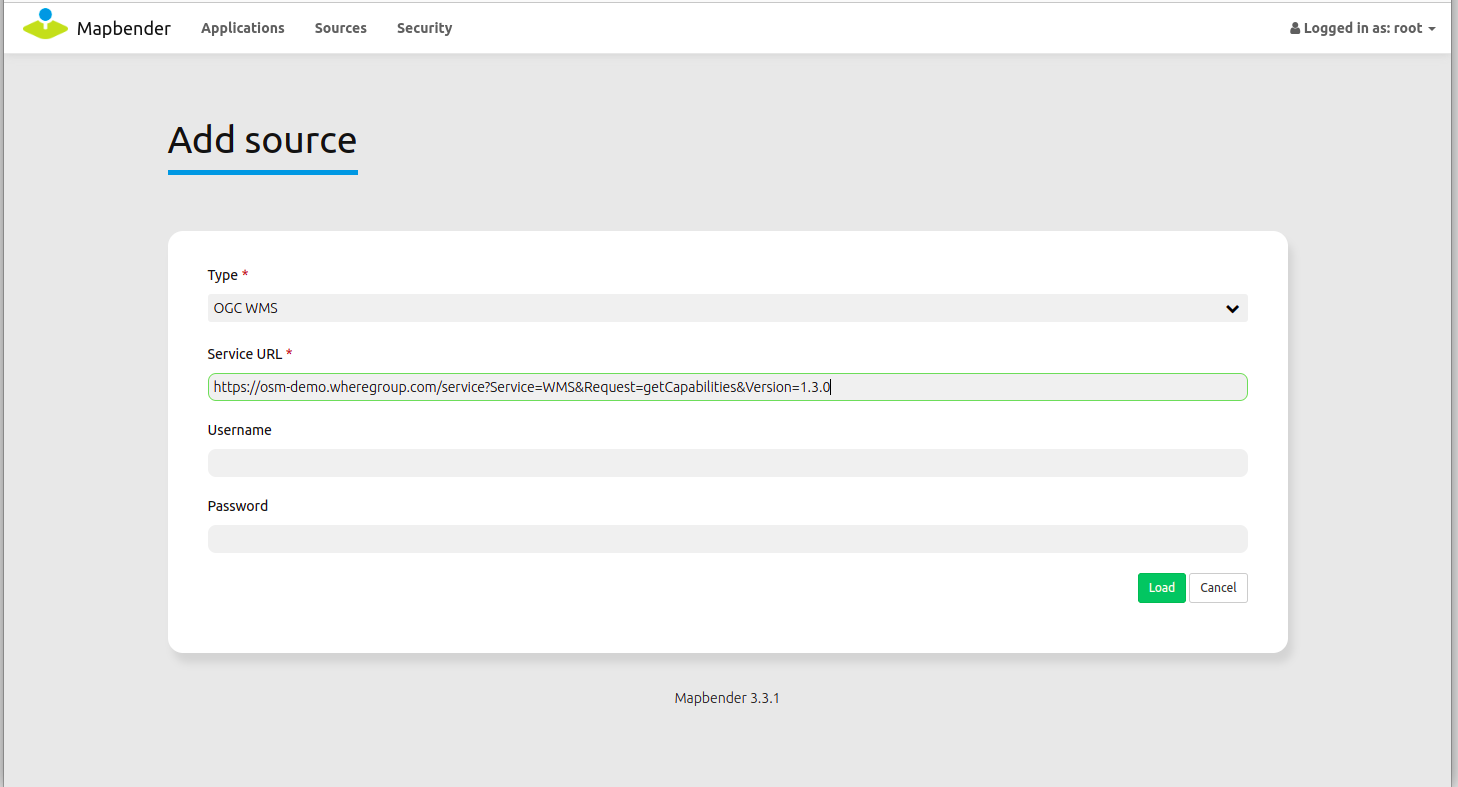
Choose menu item or use the +-Button.
Link to the WMS getCapabilities URL in the text field . Here is a example WMS: WhereGroup OSM WMS https://osm-demo.wheregroup.com/service?SERVICE=WMS&VERSION=1.3.0&REQUEST=getCapabilities
Entrez le nom d’utilisateur et mot de passe si votre service requiert l’authentification.
Click Load to load the Service to the repository.
Load another WMS https://sgx.geodatenzentrum.de/wms_topplus_open?request=GetCapabilities&service=WMS&VERSION=1.3.0
Après l’inscription au service, Mapbender affiche une vue d’ensemble de l’information fournie par le service.
Ajouter un Service à l’Application
Après le chargement réussi d’un WMS, vous souhaitez ajouter votre WMS à une application.
Choisissez .
Cliquez sur le pour ajouter un layerset, ce qui représente une collection de couches (un nom possible pourrait être principal)
Maintenant vous pouvez ajouter la couche au layerset
Cliquez sur le à votre nouveau layerset pour ajouter un Service.
Configurer votre WMS
You can configure the WMS for your specific application. Maybe you don’t want to provide all layers or you want to change the order or titles of the layer or disable the feature info or change the maxscale for a layer.
Choose to configure the Service Instance.
You will see a table with the layers of the Service.
You can change the order of the layers via drag & drop.

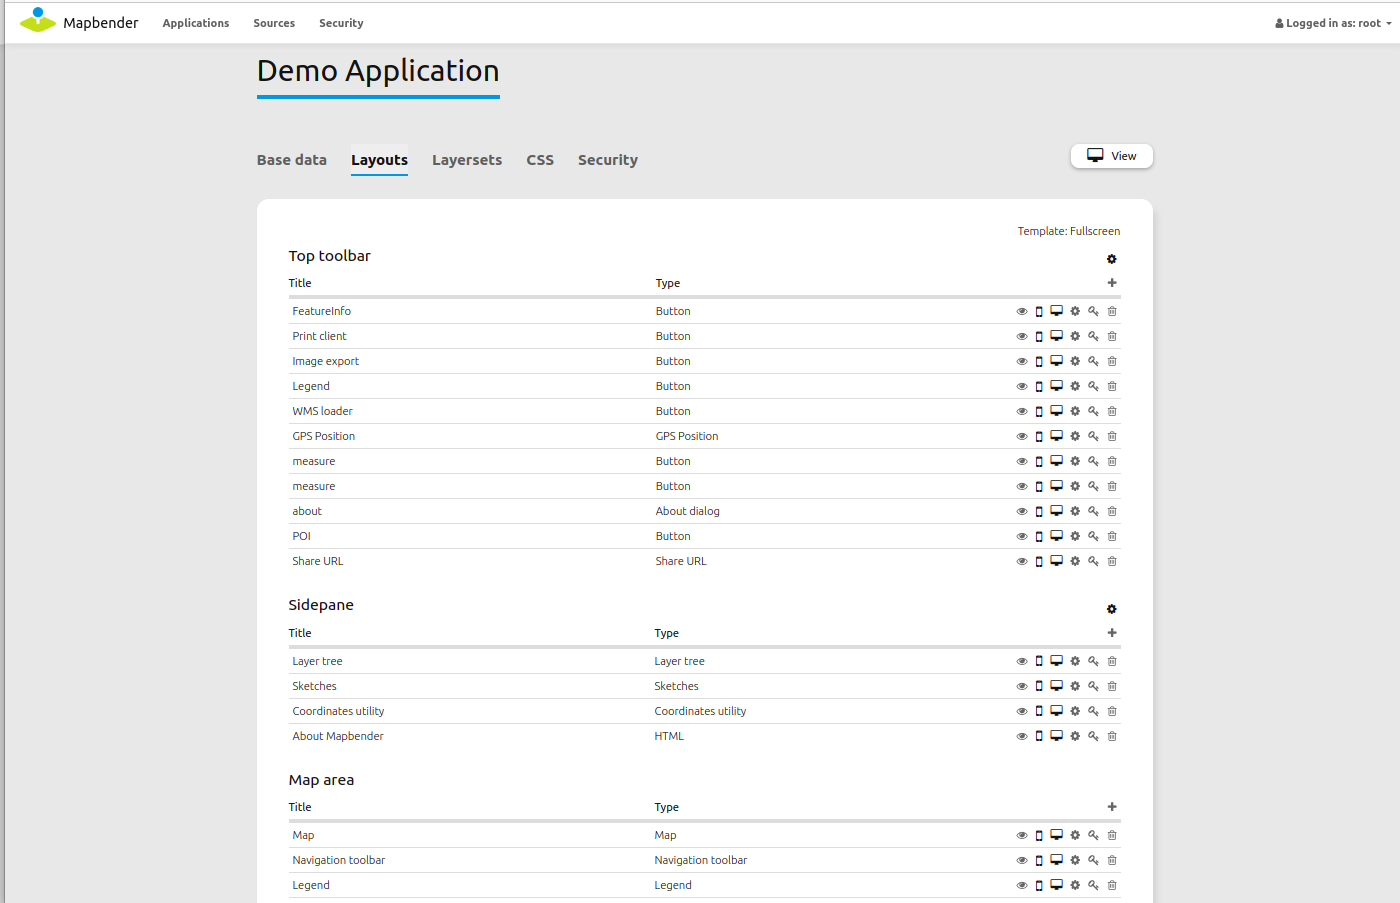
Add Elements to your application
Mapbender offers a set of elements. You can add the elements to your application. You have different regions (Toolbar, Sidepane, Content, Footer) to which you can add elements.
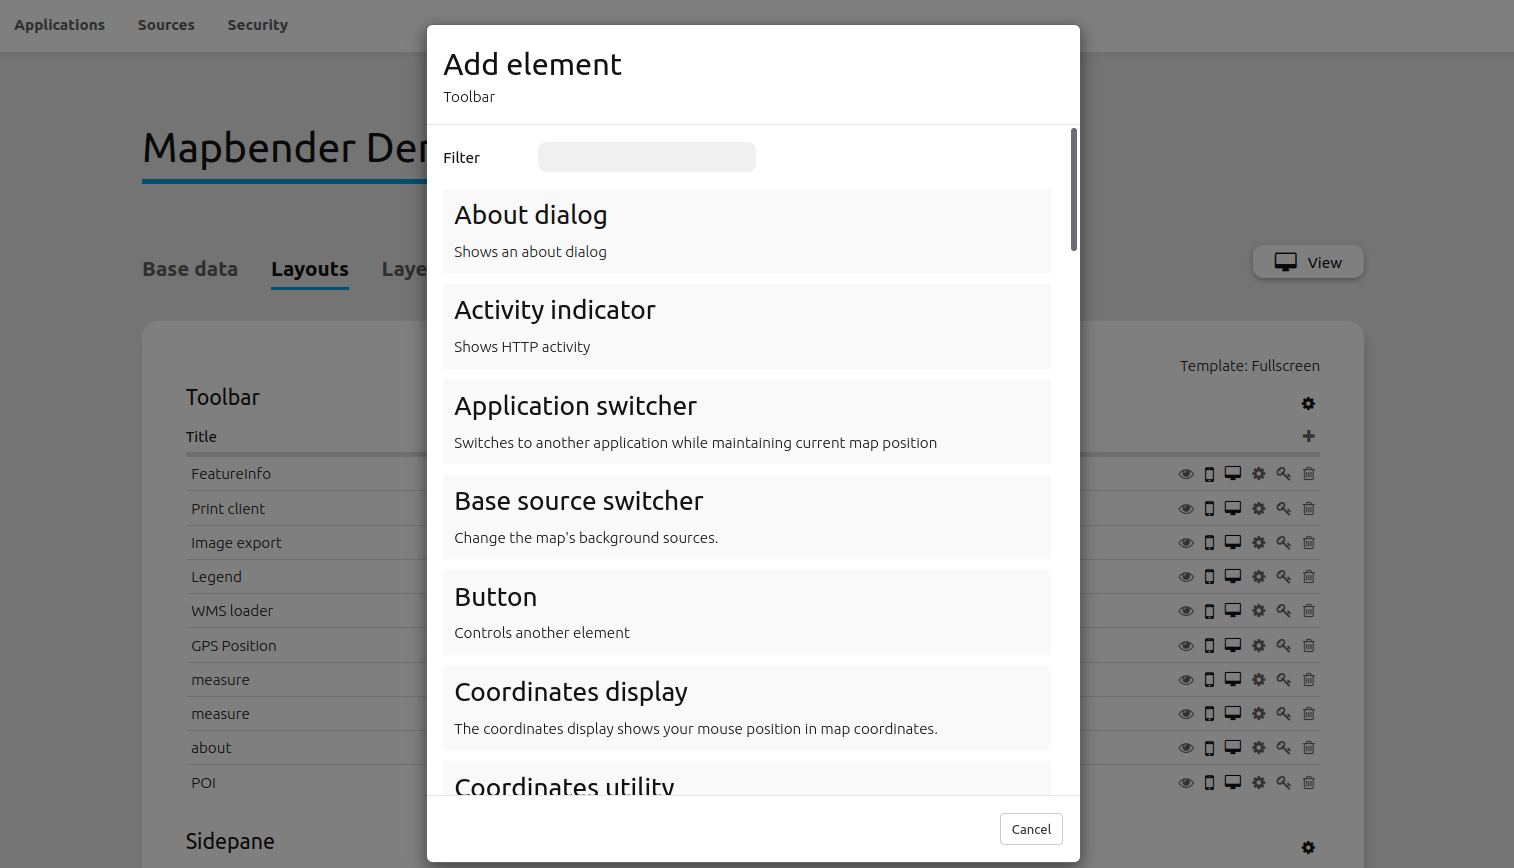
Choose to get an overview over the elements Mapbender3 provides.
Choose an element from the list.
Notice that you have different areas in your application. Make sure to add the element to a region that makes sense.
Configure the element. Notice: When you select an element for example map you see that the element has a set of attributes. Each element offers individual attributes for configuration.
You can change the position of the element via drag & drop.
Have a look at your application. Open your application from
Now you should get an idea how easy it is to change a Mapbender application without changes in the code.
Vous trouverez des informations détaillées sur chaque élément dans la Documentation Mapbender.
Choses à essayer
add a Map Element to the content of your application
add a Layertree to the sidepane of your application
add a Legend to the sidepane of your application
add a print element to the content
add a button that opens the print to the top of your application
add the Navigation Toolbar to the content
add an overview map to the content
add a Copyright and change the copyright text
add a Scales Selector and an SRS Selector to the footer
Voici quelques défis supplémentaires que vous pouvez relever :
Try to load some WMS in your application. Try to configure your WMS.
Try to create an individual application.
Create users and groups, and assign an application to the new users/groups.
Ensuite ?
This is only the first step on the road to using Mapbender. There is a lot more functionality you can try.
Mapbender Website https://mapbender.org/
You can find tutorials at https://doc.mapbender.org
You can find an extended tutorial at https://doc.mapbender.org/en/quickstart.html
Get involved in the project https://mapbender.org/community/