

Mapbender Quickstart
Mapbender is a web based geoportal framework to publish, register, view, navigate, monitor and grant secure access to spatial data infrastructure services.
This Quick Start describes how to:
start Mapbender
create an application
load a Web Map Service (OGC WMS)
configure WMS
add elements to an application
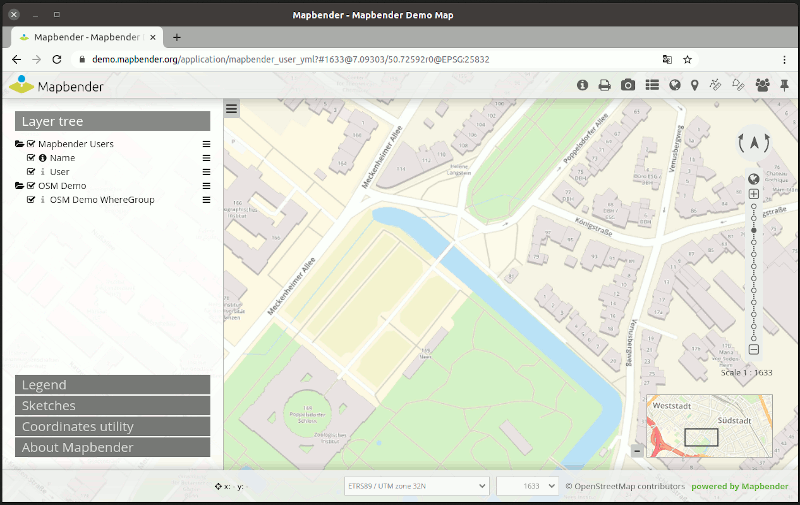
This is how a Mapbender application can look like:
Contents
Start Mapbender
Choose from the start menu or visit http://localhost/mapbender/app.php. The application will take a few moments to start up
If you have any difficulties running Mapbender, please check whether your Apache web server and your PostgreSQL database are running. Or if you use SQLite as database whether you have write access to the file.
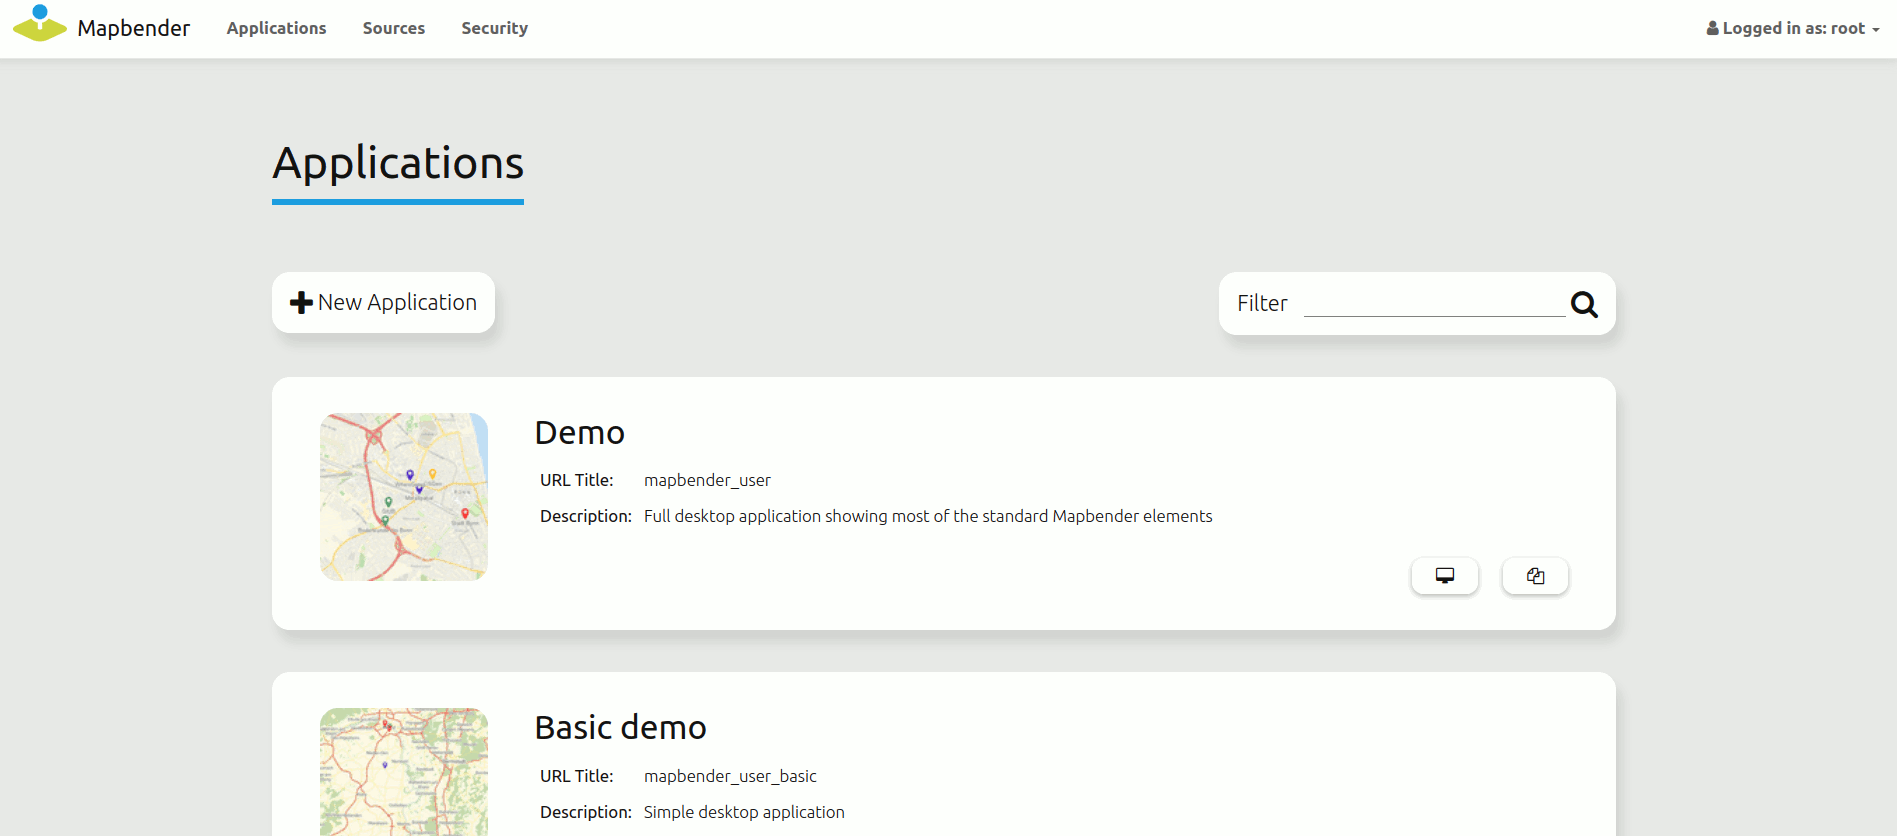
The Welcome page lists applications that are public and can be used by all users. The applications are listed with a screenshot, a title and a description.
You can open an application by click on the title, the screenshot or the start button.
Before you can administrate with Mapbender you have to login to get access to the administration.
Click on Login at right-top to open the login page. Login with username root and password root (This is the default user and password that you get after installation of Mapbender on OSGeoLive. Please change the root password if you want to run a productive environment. Please don’t delete the user root.).
Create an individual application
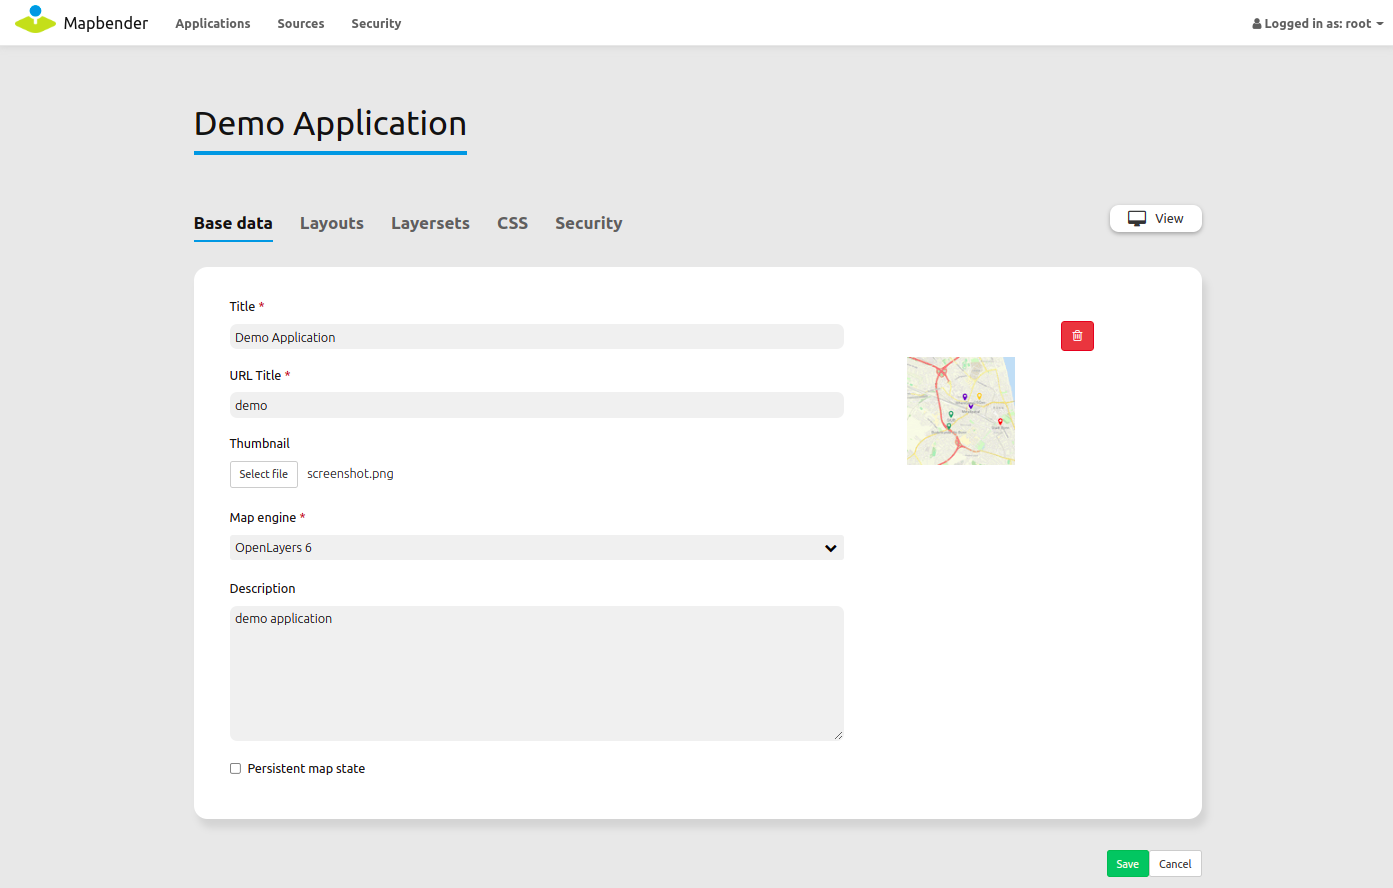
Create a new application by providing basic information about your application. After that you use the edit mode to add elements, layers and security.
Choose
Define a title and description for your application
Define an URL title which will be used in the URL to open the application. It can be the same as the title
Upload an image file as screenshot for the application overview
Choose a template for your application
Choose the button Create to create the application
Tip
You can easily create an application by copying an existing application using the Duplicate Application button.
Your application is set up. Next you need a WMS to be displayed in your application.
Loading Web Map Services
You can load OGC Web Map Services (WMS) to your application.
A WMS returns an XML-file when the getCapabilities document is requested. This information is parsed by Mapbender and Mapbender gets all the necessary information about the service from this XML
Tip
You should first check the Capabilities document in your browser before you try to load it with Mapbender
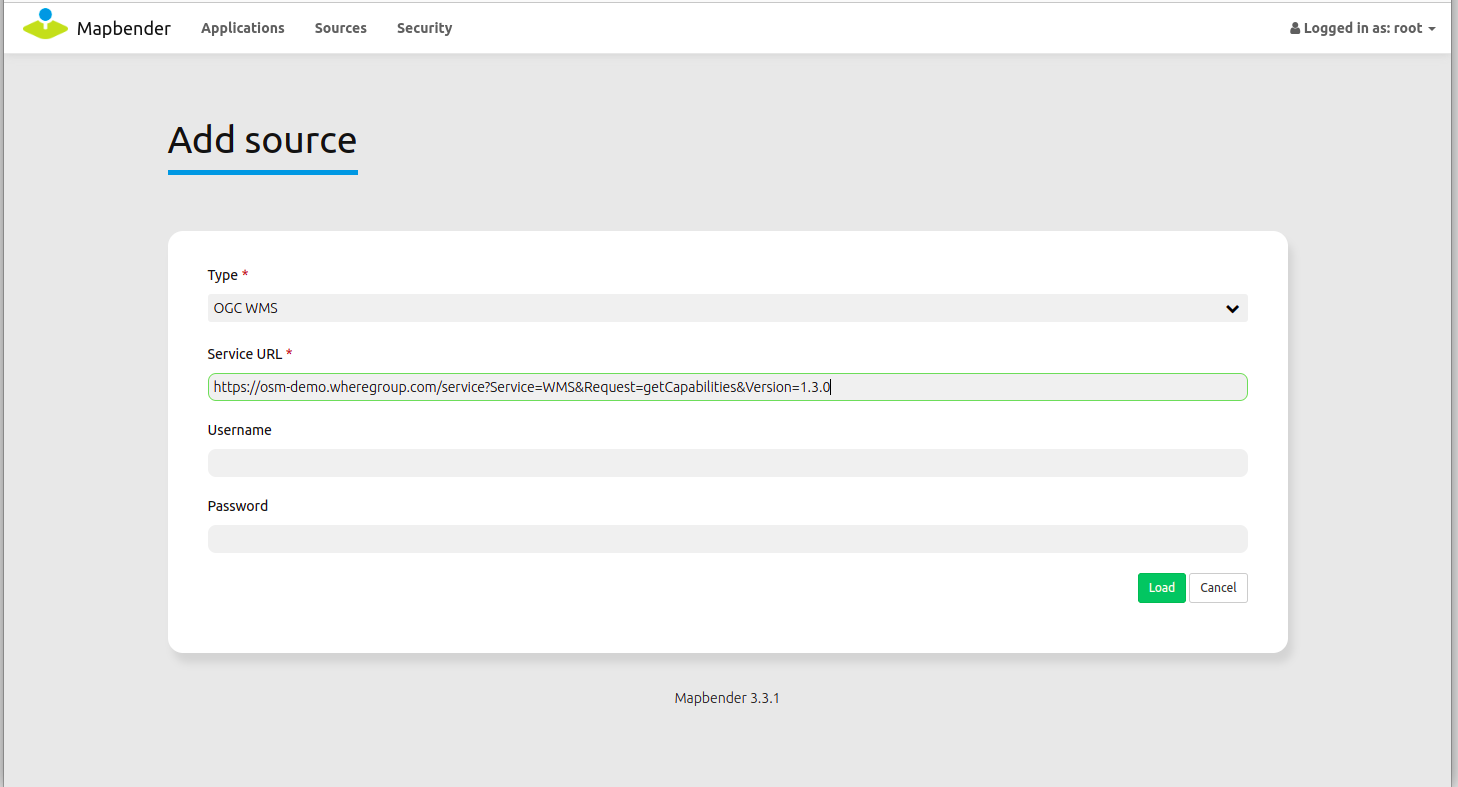
Choose menu item or use the +-Button.
Link to the WMS getCapabilities URL in the text field . Here is a example WMS: WhereGroup OSM WMS https://osm-demo.wheregroup.com/service?SERVICE=WMS&VERSION=1.3.0&REQUEST=getCapabilities
Enter username and password if your service needs authentication.
Click Load to load the Service to the repository.
Load another WMS https://sgx.geodatenzentrum.de/wms_topplus_open?request=GetCapabilities&service=WMS&VERSION=1.3.0
After successful registration of the service Mapbender will display an overview on the information that was provided by the service.
Add Service to Application
After the successful upload of a WMS you want to add your WMS to an application.
Choose .
Click on the to add a layerset, which represents a collection of layers (a possible name could be main)
Now you can add layer to the layerset
Click on the at your new layerset to add a Service.
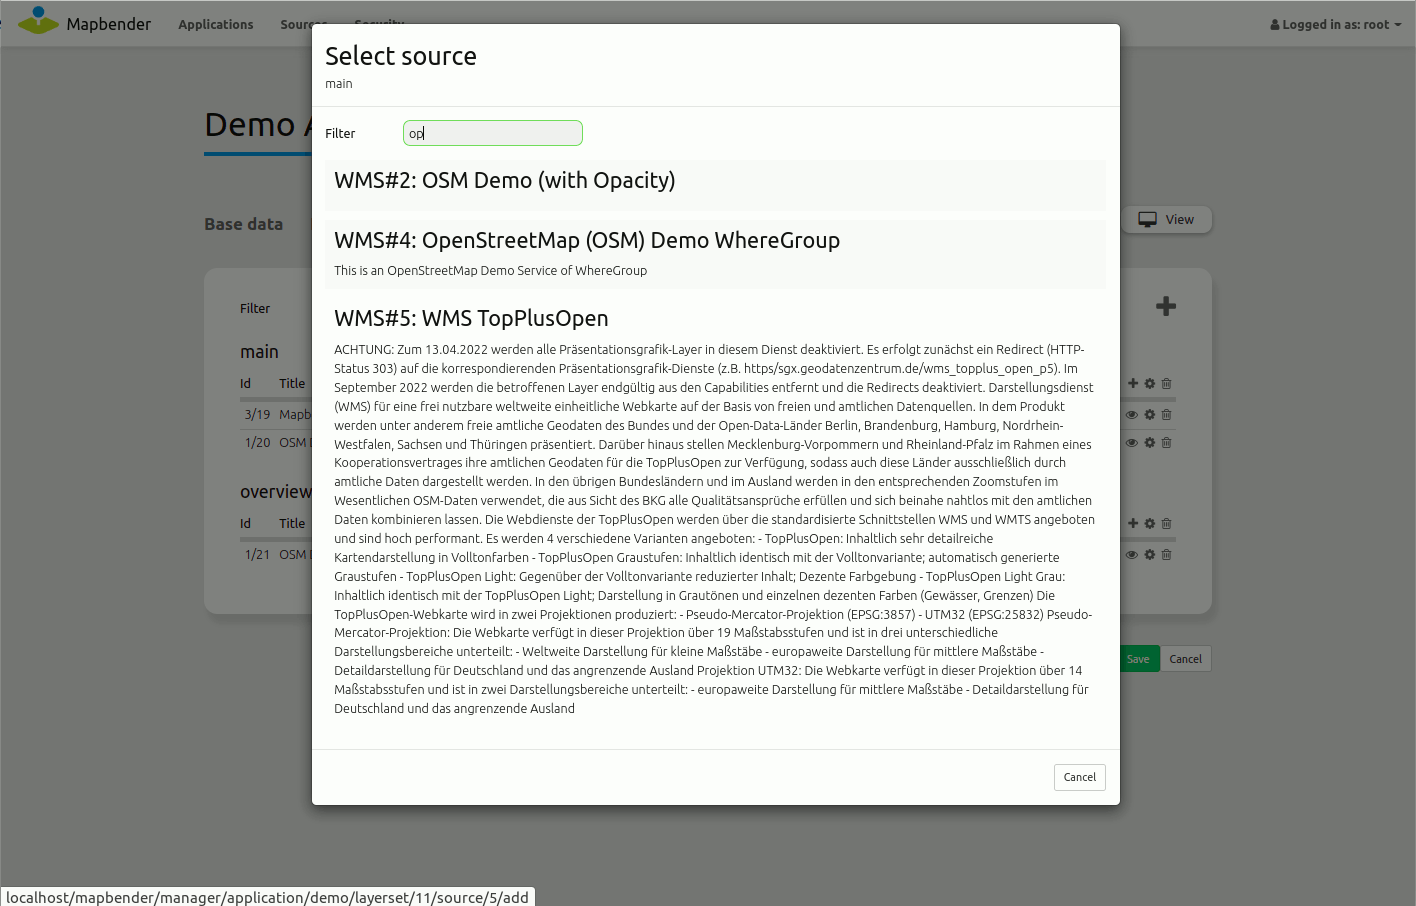
Configure your WMS
You can configure the WMS for your specific application. Maybe you don’t want to provide all layers or you want to change the order or titles of the layer or disable the feature info or change the maxscale for a layer.
Choose to configure the Service Instance.
You will see a table with the layers of the Service.
You can change the order of the layers via drag & drop.

Add Elements to your application
Mapbender offers a set of elements. You can add the elements to your application. You have different regions (Toolbar, Sidepane, Content, Footer) to which you can add elements.
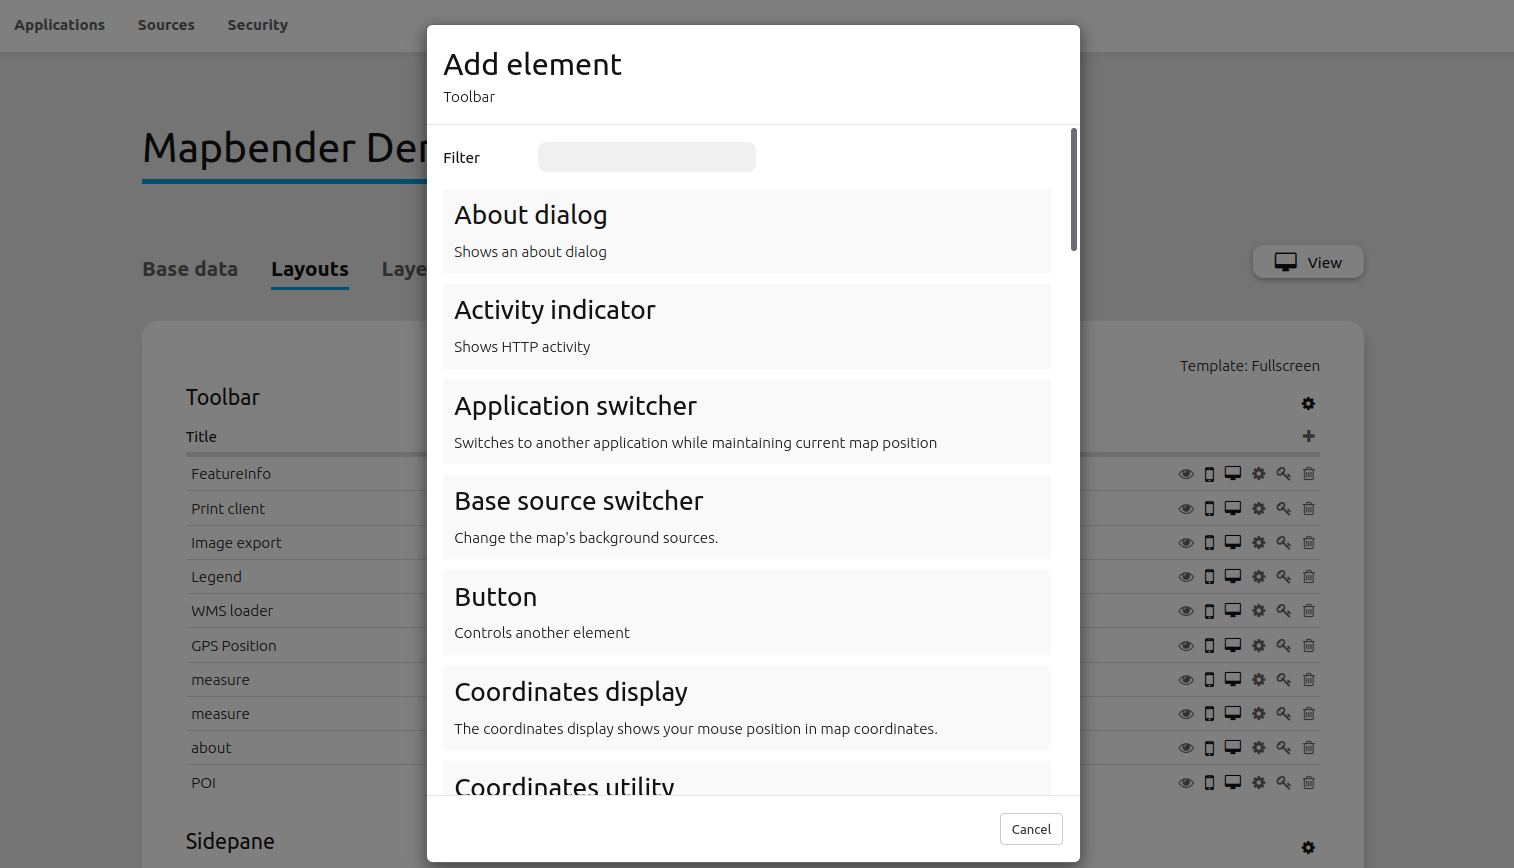
Choose to get an overview over the elements Mapbender3 provides.
Choose an element from the list.
Notice that you have different areas in your application. Make sure to add the element to a region that makes sense.
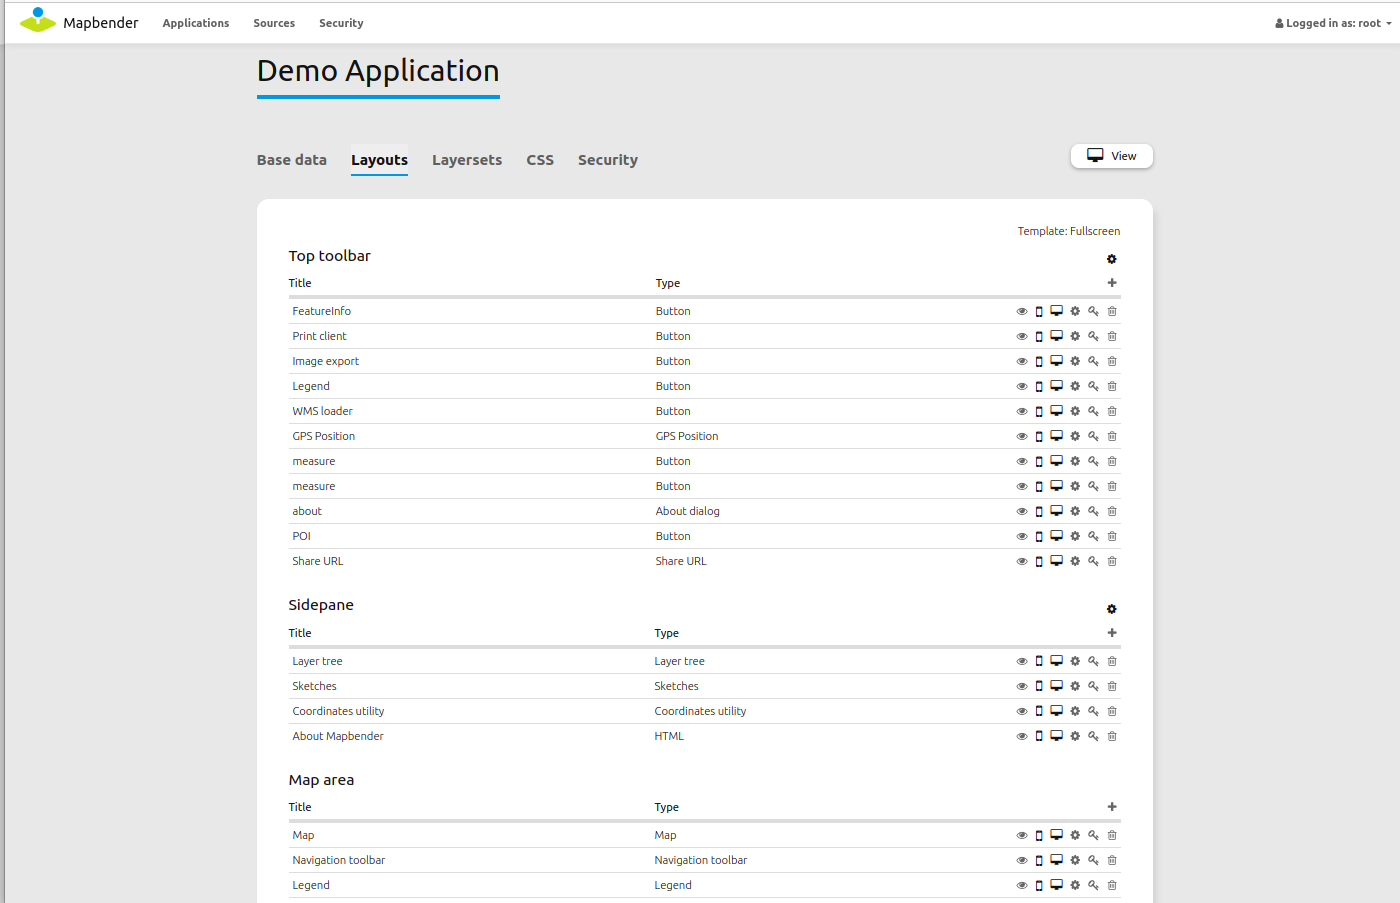
Configure the element. Notice: When you select an element for example map you see that the element has a set of attributes. Each element offers individual attributes for configuration.
You can change the position of the element via drag & drop.
Have a look at your application. Open your application from
Now you should get an idea how easy it is to change a Mapbender application without changes in the code.
You find detailed information on every element in the Mapbender element documentation.
Things to try
add a Map Element to the content of your application
add a Layertree to the sidepane of your application
add a Legend to the sidepane of your application
add a print element to the content
add a button that opens the print to the top of your application
add the Navigation Toolbar to the content
add an overview map to the content
add a Copyright and change the copyright text
add a Scales Selector and an SRS Selector to the footer
Here are some additional challenges for you to try:
Try to load some WMS in your application. Try to configure your WMS.
Try to create an individual application.
Create users and groups, and assign an application to the new users/groups.
What Next?
This is only the first step on the road to using Mapbender. There is a lot more functionality you can try.
Mapbender Website https://mapbender.org/
You can find tutorials at https://doc.mapbender.org
You can find an extended tutorial at https://doc.mapbender.org/en/quickstart.html
Get involved in the project https://mapbender.org/community/