

GeoNetwork Quickstart
GeoNetwork is a catalog application to manage spatially referenced resources. It provides powerful metadata editing and search functions as well as an interactive web map viewer. It is currently used in numerous Spatial Data Infrastructure initiatives across the world.
Prerequisites
GeoNetwork can directly be started from the OSGeo Live start menu and will be available at http://localhost:8080/geonetwork some moments later. Check the Installation Guide if you are using GeoNetwork in some other context.
Throughout this guide we will use the URL http://localhost:8880/geonetwork to refer to the catalog, please substitute a different URL if this is not correct for your system.
Access the catalog
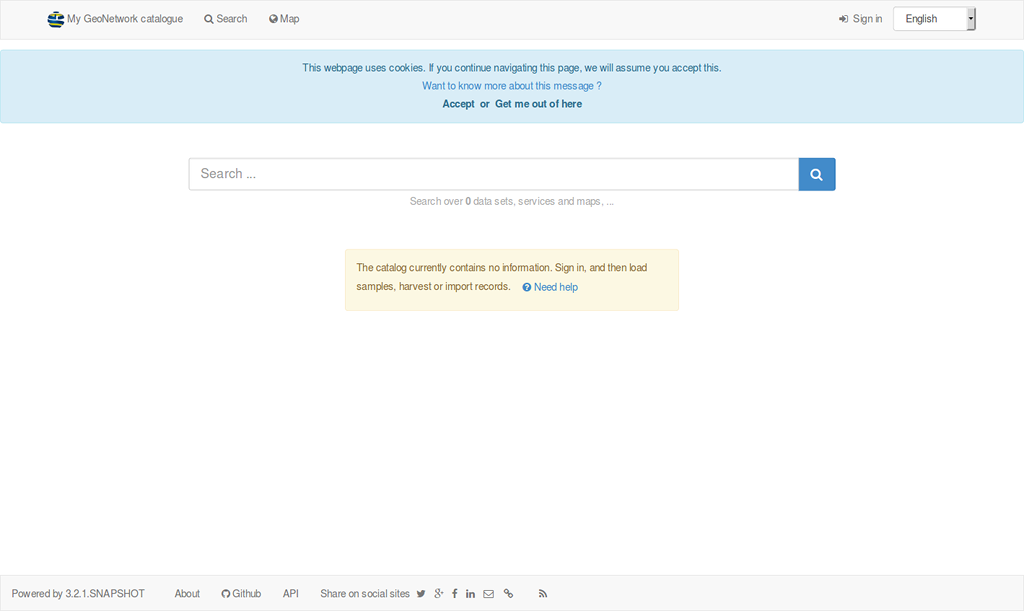
In the Web Services folder on the Desktop (or via the start menu), double-click start GeoNetwork. This will open the Firefox web browser at the URL http://localhost:8880/geonetwork. This will be referred to throughout this document as the homepage.
You can return to the homepage at any point by selecting the catalogue logo in the top left of the top toolbar. In the screenshot below, this is labelled “My GeoNetwork catalogue” but it may have a different name and logo.
Sign in
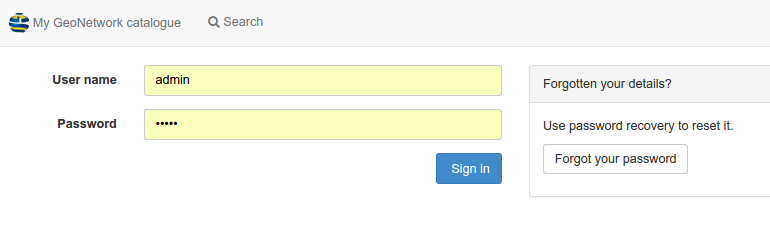
Select Sign in in the top right of the top toolbar in the homepage to visit the sign in page. Enter the username admin and password admin and select the blue Sign in button to sign in as the catalog administrator.
Once signed in, the top toolbar will change to include some additional elements, namely a link to the Admin console, the name of the signed in user, a link to Sign out, and a dropdown box for changing the interface language.

Load sample data
Select Admin console in the top toolbar to access the administrative functions in the catalog, then select the Metadata and templates menuitem to access the sample data and templates tab.
This page lists all the metadata standards loaded in the catalog. The default standards in GeoNetwork are:
Geographic information - Metadata (iso19139:2007)
Geographic information - Metadata (iso19115-3.2018)
Dublin Core (for CSW only) (csw-record)
Dublin Core (dublin core)
Geographic information - Methodology for feature cataloguing (iso9110)
For the purposes of this Quick Start Guide, select Geographic information - Metadata (iso19139:2007) and then select first the Load samples for selected standards button below the list.

When this process is complete, a notice will appear in the right of the window indicating that 5 record(s) have been added for schema ‘iso19139’.
Search for spatial data
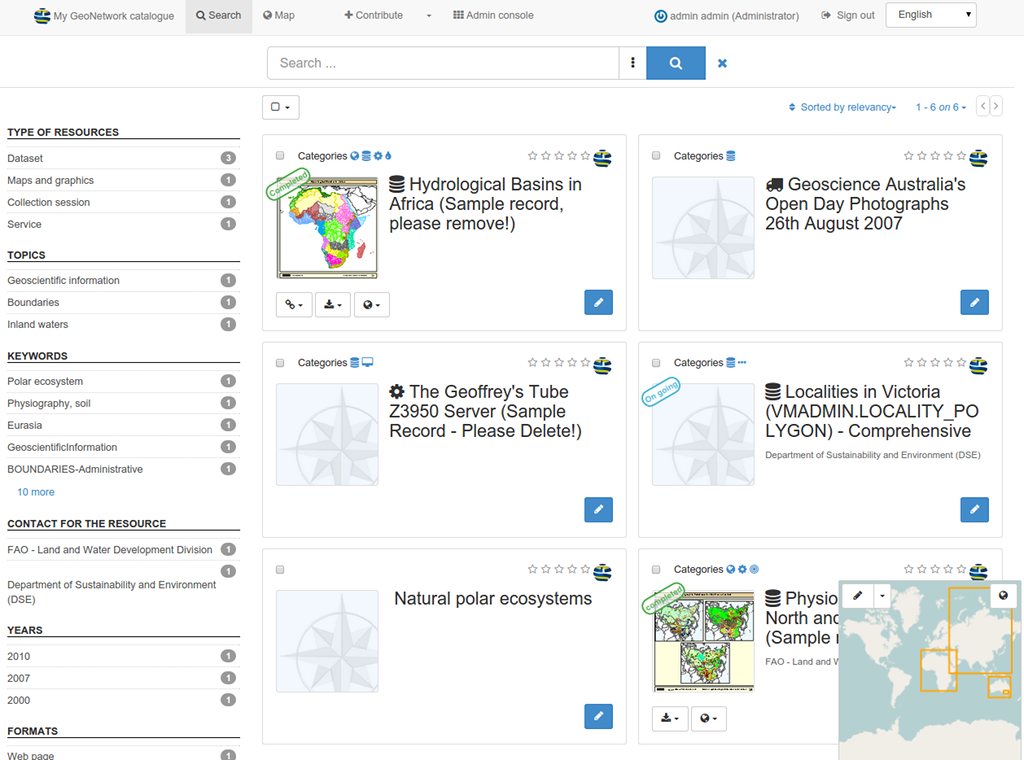
Return to the catalog homepage by selecting the catalog name in the top left of the top toolbar. The homepage will now show icons representing the loaded records, classified by topic (in blue) and resource type (in green). Below this are tabs classifying the records by date added (latest news) and popularity (most popular).
Select Search in the top toolbar to access the Search page.
The Search page provides different ways for search:
a full text search box providing suggestions as you type,

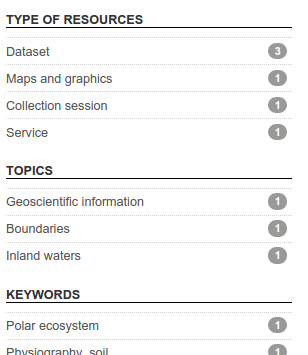
Search facets, or filters, that provide ways of narrowing down the search results, such as Type of Resource, Topic, Keywords,
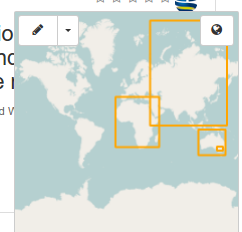
An overview map, where you can draw a box to filter results spatially (Hint- if you can’t see this, select MAP in the bottom right corner of your page)
By selecting the vertical ellipsis in the search box you can access the advanced search panel and search by category, keyword, contact, or records within a specific time period.

Display results
The search results are depicted as “cards”, showing the Categories the metadata is classified with, the title of the record, a thumbnail, an abstract (if present) and links to downloads and other resources (if present).
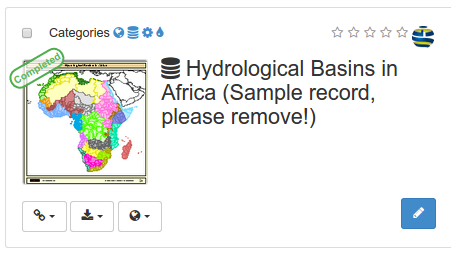
Select a card to take you to a page showing the full details for that record. Select the blue Back to search button to return to the Search page when you’re done.
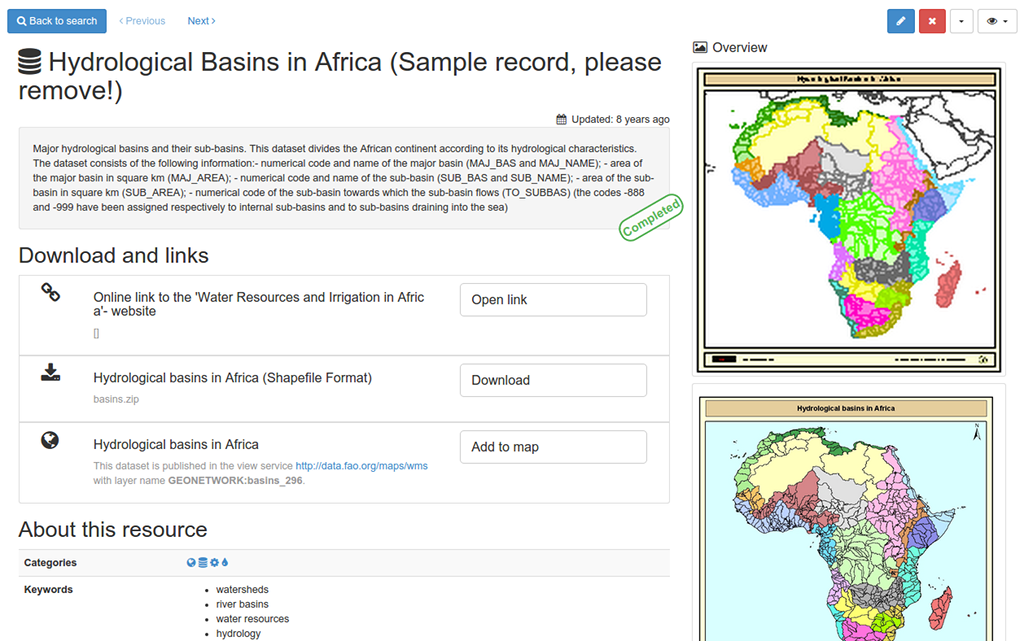
In the top right of the record are icons for:
Editing the record (when logged in)
Deleting the record
Managing the record (such as assigning viewing or editing privileges, transferring ownership to a different user)
Downloading the record as multiple formats
Switching to Full view or XML view
Switching to Full view will show more detailed metadata. To switch back to the original view select Default view from the list.
Add layers to the map
From the Search tab, click on the card for Physiographic Map of North and Central Eurasia (Sample record, please remove!) to view the metadata. Move down the page until the Download and links section is visible.
The Download and links section shows external resources associated with the metadata record, such as:
A file download of the data,
Further information such as a web page,
A Web Mapping Service (WMS) or Web Feature Service (WFS) link to the data.
Locate the link labelled as This dataset is published in the view service (WMS) available at http://data.fao.org/maps/wms with layer name GEONETWORK:phy_landf_7386. and select Add to map.
This step will switch you to the Map tab in the catalog, and after a short delay the WMS layer will be added to the map.
Tools for using the Map are arranged in two groups in the right-hand side of the map. The top group looks like this:

The tools are as follows:
Add new layers to the map. You can search the catalog, add layers from web services, or KML,
Manage existing layers or change the background map (the default is openstreetmap),
Filter layers on the map (if configured),
Manage the Map, by setting it back to default settings, loading a new map definition, downloading the current map, or saving the map configuration as a layer in the catalog,
Print the map,
Synchronise layers with the small map on the Search tab,
Measure distances on the map,
Draw annotations on the map.
The lower group of tools look like this:
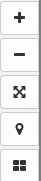
They are as follows:
Zoom in on the map,
Zoom out on the map,
Zoom to the initial extent of the map,
Zoom to your position (if your browser is location-enabled),
Add a graticule (grid lines) to your map.
Additionally there is a geographic search tool in the top left.
Using the Manage Layers tool, select the cog symbol next to Physiography of North and Central Eurasia Landform and select Zoom to layer.
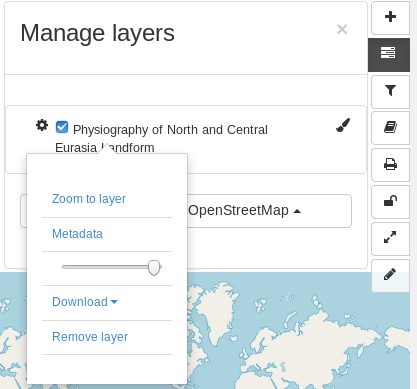
The map will zoom to the extent of this layer.

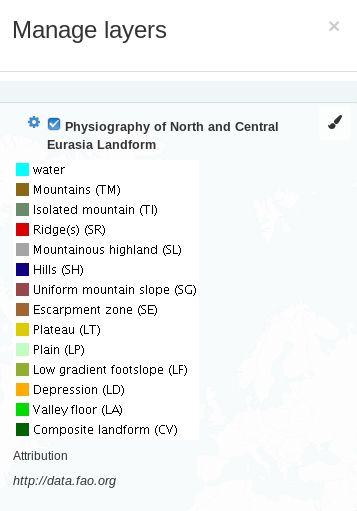
Select the paintbrush icon next to the layer to see the legend, showing you the classification used for the display. You can dismiss this dialog by selecting the X in the top right corner.
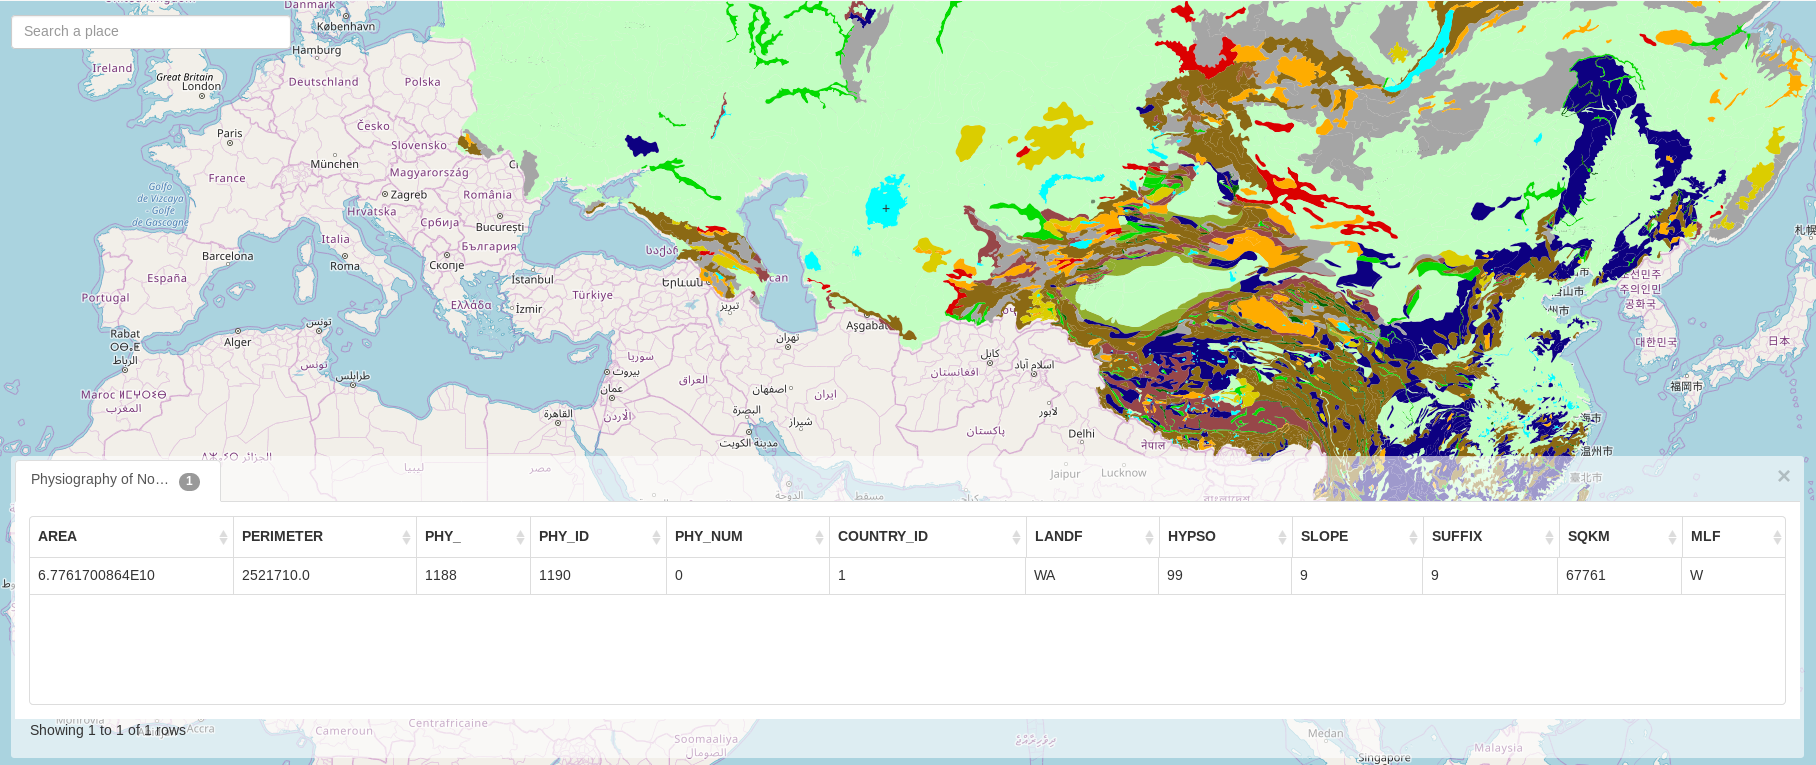
Select a feature on the map corresponding to a category in the legend, such as an area of water. Zoom and pan around the map as needed to identify a suitable area. Clicking on the feature will bring up an identification box at the bottom of the map showing details about the area selected.
What next?
Visit the Geonetwork User Guide and try the chapter on Describing Information, to learn how to create and edit metadata records.
Follow up by visiting subsequent chapters to learn how to associate resources with your metadata, tag it with keywords and add it to categories, and publish your metadata to the outside world.